Updated on 28/10/25 by Ben_OVO
Having a new smart meter installed is something which most customers only experience once. This topic shows what the process involves and highlights particular issues with the newer SMETS2 meters which OVO started installing widely in March 2019.
You must be present for a smart meter installation. The Engineer needs access to the house, even if both gas and electricity meters are in external enclosures. There is an initial survey of the state of gas appliances and your electric consumer unit. Photographs are taken and any gas boiler is turned off.
The electricity meter is usually changed first. The Installer is permitted to snip the seal on the main fuse and can reseal it without needing to call your Distribution Network Operator (DNO).
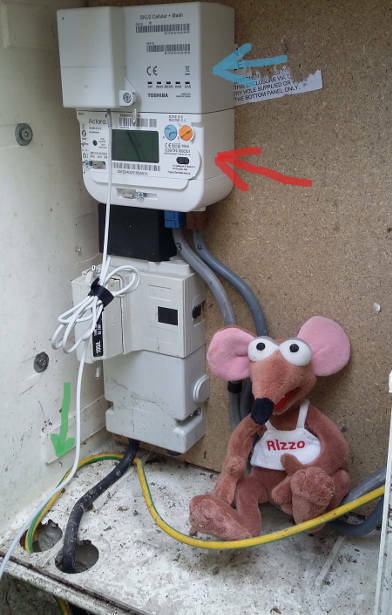
Here my SMETS2 meter is indicated with a red arrow. This one is made by a US Company called Aclara. It has two buttons marked A & B rather than the keypad of the earlier SMETS1 meters, which were manufactured by Secure.
Above the meter itself there is a communications module (blue arrow) which allows data transfer via the mobile phone network. There are several versions. As I'm in a rural area of Devon with relatively poor signals, this Toshiba unit is a Mesh Network device. It connects to an external aerial via the wire marked with a green arrow.
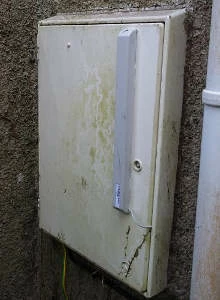
The aerial is the tall rectangular box which is literally stuck onto the outside of the door.
Your gas meter may be in a wall mounted enclosure, or buried in a "semi-concealed" box as is mine.
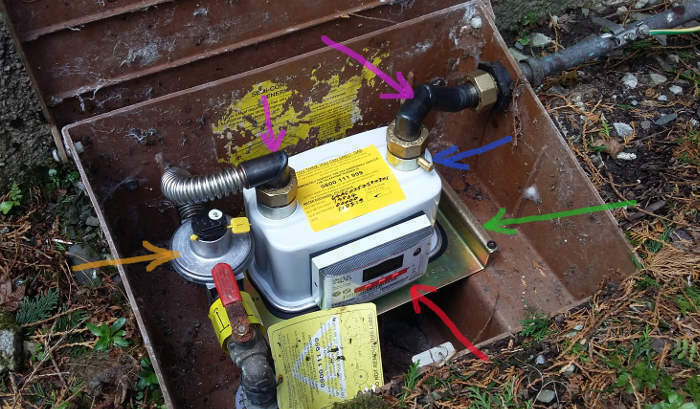
The Installer first removes the old meter including the round regulator (orange arrow), and then screws a steel mounting frame in place, shown here with a green arrow.
The meter may seem a relatively large device, but it's actually two items. The actual SMETS2 smart meter is indicated with the red arrow, and slots into the larger outer body.
My new gas meter is manufactured by Uniflo. Because there is no electricity available, it contains an inbuilt Lithium battery which should last around 10 years. A gas smart meter spends most of its time in sleep-mode to conserve power, waking up every few seconds to send a signal to the SMETS2 electricity meter.
OVO have designed and fabricated right-angled steel pipes marked here with purple arrows. These minimise the height required and allow the enclosure lid to properly close.
During the commissioning process, the installer connects a manometer to the test point identified with the blue arrow. The gas pressure pushes the fluid up one side of the u-shaped tube. If it remains steady over a two-minute timed period, then there are no leaks.
The Installation Engineer will now take another set of photographs which get inserted into relevant places in the electronic "form" on his mobile phone. There is a minimum set of 23 pictures which must accompany any installation.
As the exact installation process may evolve over time, please note that these SMETS2 meters were installed on 11th March 2019.
This guide continues in the comments below, or click on the headings below to go directly to that comment:
Smart meter communications network
Taking a manual electricity reading
Communications Hub Device Variations - South & Central Territories
OVO member but not got a smart meter yet? - Book today!
Smart meter not communicating? Fill in this Online Form.
Interested but not yet an OVO member? - Check out our plans!


