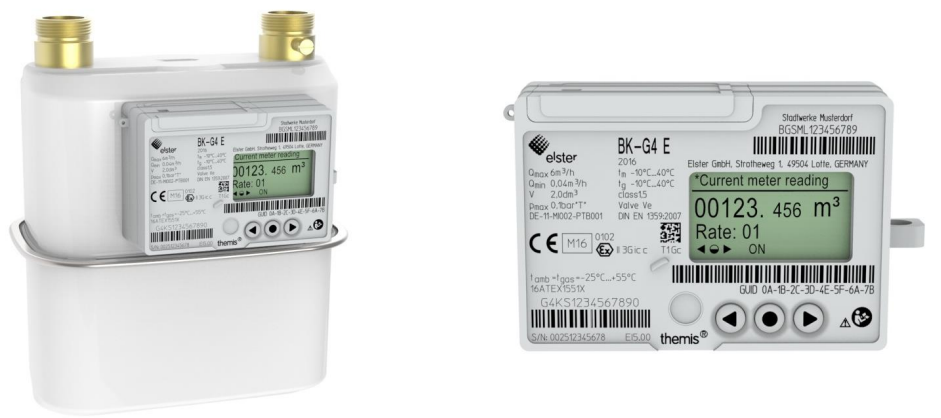
Updated on 22/11/25 by Ben_OVO
Honeywell (Elster) AS302P ‘SMETS2’ electricity meter guide
Have you got a Honeywell smart meter and want to know a bit more about it? Not sure what you have installed? We’ve got you covered.
In this guide, we’ll be talking about a Honeywell SMETS2 meter, which stands for ‘Smart Meter Equipment Technical Specifications’ 2. Although OVO doesn’t install these meters, this second generation of smart meter should be able to communicate with any and all suppliers via a central system.
How to identify if I have a Honeywell (Elster) AS302P (SMETS2) electricity meter
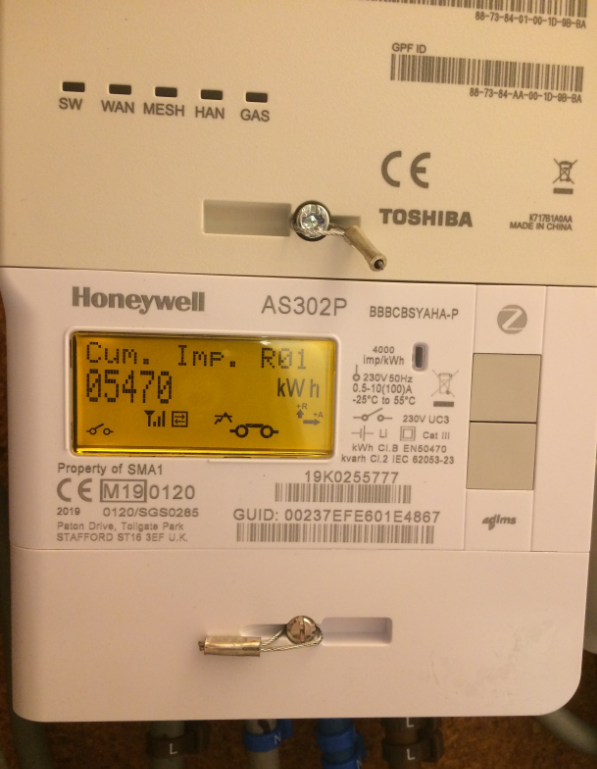
Image courtesy of @chafran and their topic here.
As the image shows, the meter serial number (MSN) begins with either 188K/19K.
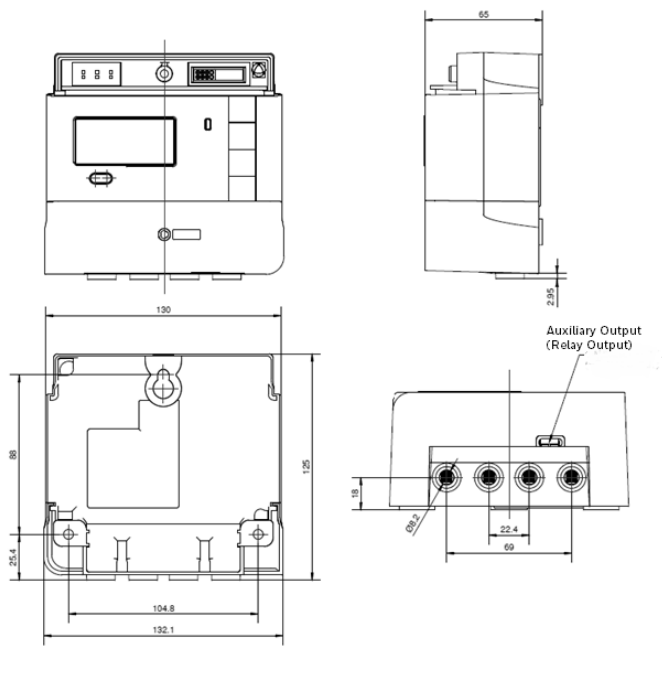
Dimensions of Honeywell (Elster) AS302P (SMETS2) electricity meter
What to do if the meter isn’t working?
The smart meter should be sending your meter readings remotely, either every half an hour, every day, or every month.
If you suspect your meter has an issue and isn’t sending these readings, perhaps due to a communication issues, see our SMETS2 smart meter health check guide here. If you’ve just had the meters fitted or recently changed supplier, it may not be an issue with the meter or its communication, so it’s recommended to allow your supplier a few weeks before submitting meter health check results.
Reading the meter manually
-
Press the ‘top’ of the two buttons on the face of the meter (not the in-home display) to wake up the display, which will wake up the meter display screen and show the ‘General’ or ‘Boost’ (if applicable) menu.
-
Select the ‘bottom’ push button (think of this as the ‘next’ option) to step through menu options: ‘General’ / Boost, then select the bottom push button again to bring up ‘Registers’ menus.
-
Select this ‘Registers’ menu by pressing the ‘top’ (think of this as the ‘enter’) push button.
-
Toggle through the options via the ‘bottom’ push button: ‘Cumulative’, then ‘Rates in Use’, and then ‘Rates 1-48’ menus will be displayed.
-
Select the ‘Rates 1-48’ menu by pressing the ‘top’ push button.
-
Use the ‘bottom’ push button to step through menu options: ‘Imp. R1’, ‘Imp. R2’, ‘Imp. R3’ etc
-
Imp R1 for single-rate tariffs and Imp R1 and Imp R2 for 2-rate (economy 7) tariffs
How does a Honeywell (Elster) SMETS2 meter communicate?
Unlike a SMETS1 Honeywell/Elster meter, SMETS2 electricity meters have a communications (comms) hub attached to them. The electricity meter, gas meter and IHD all communicate with the comms hub via the ‘home area network’ (HAN). Only the comms hub uses the ‘wide area network’ (WAN) and it communicates with the Data Communications Company (DCC). The DCC then communicates with our billing platform.
Honeywell (Elster) BK-G4 (SMETS2) gas meter guide
Identifying a Honeywell (Elster) BK-G4 (SMETS2) gas meter
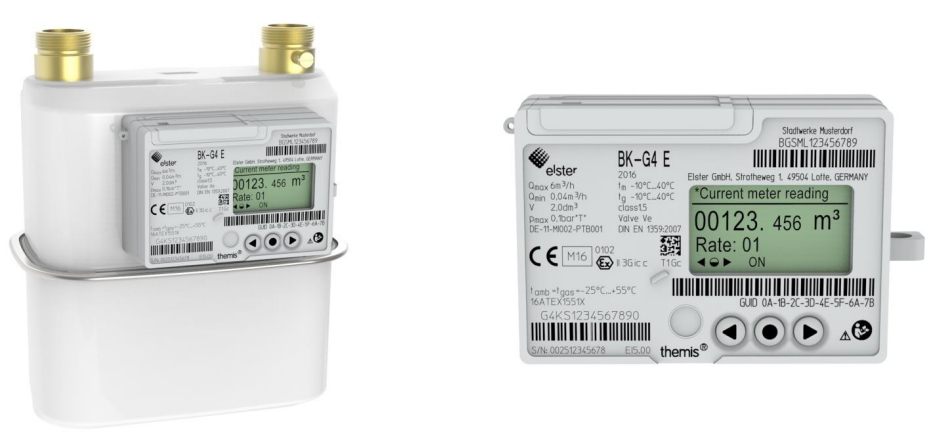
The meter serial number (MSN) begins with G4K and is shown above the barcode in the bottom left corner of the meter face.
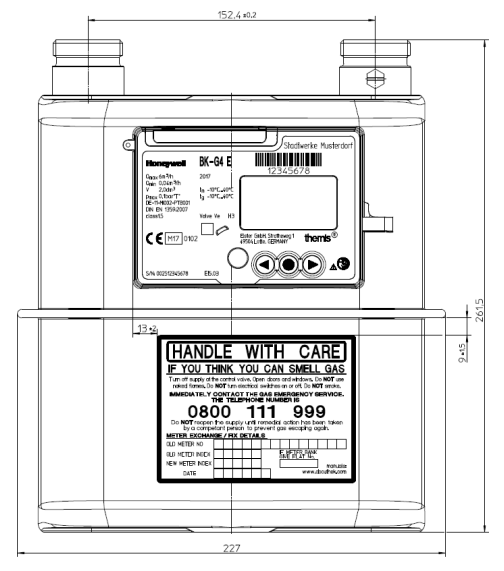
Dimensions of Honeywell (Elster) BK-G4 (SMETS2) gas meter
What to do if the meter isn’t working?
Although the gas meter communicates with your supplier differently to the electricity smart meter, the advice is still the same: If you suspect your meter has an issue and isn’t sending these readings, perhaps due to a communication issues, see our SMETS2 smart meter health check guide here. But bear in mind that if you’ve just had the meters fitted or recently changed supplier, it may not be an issue with the meter or communication, so it’s recommended to allow around 2 weeks before submitting meter health check results.
Reading the meter manually
-
Press either of the two buttons below the meter’s display screen to wake up this display.
-
The gas meter reading is displayed on this default home screen, labelled as ‘Current meter reading’. This is shown in cubic meters (m3), and you should ignore the decimal places.
Need more help?
This topic is now closed, so you won’t be able to reply here. If your question hasn’t been answered or you need more advice, feel free to ask the community — we’re here to help!
Give us your feedback!
Was this article helpful? Is our Library missing content? Share your anonymous feedback here and help us improve!


