


Part 3: Installing wet under floor heating
(a) In solid floors
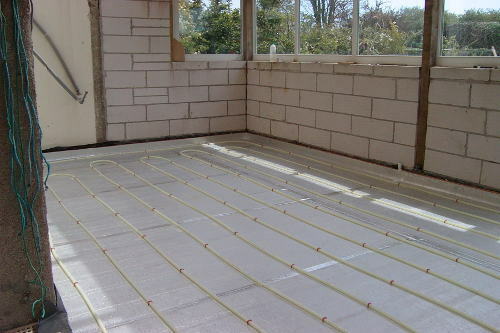
When building a Solid floor, the pipework gets installed at an early stage in a construction/renovation project.
The usual strategy is to compact a level sub-floor of hardcore, topped off with a layer of sand to ensure no sharp points are left.
Place a damp-proof sheet on top of the sand, bringing it a good 250mm up the walls.
Place a double-layer of insulation boarding on top of the DPC, overlapping it to ensure there are no gaps. You require the total insulation to be 100mm minimum depth (under current Building Regs).

Use plastic push-in staples to hold in the place the UFH pipe as you snake it across the floor. I’ve used pipe runs 320mm apart.
The pipe specification was discussed here in Part-2.
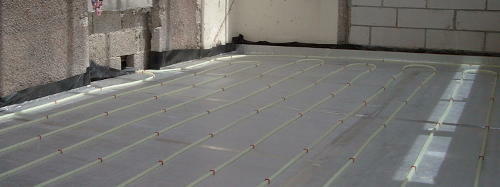
Around the edges of the floor that adjoin an exterior wall, fit a 100mm upstand of insulation board. I’ve used 40mm thick. This prevents heat from the floor leaking though the outer walls.
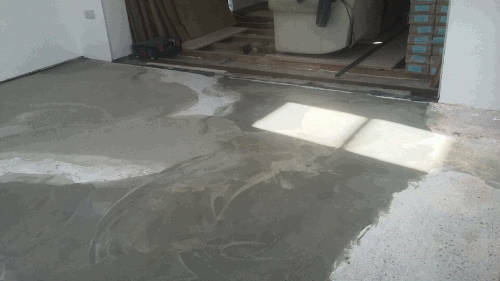
Pour concrete to a minimum depth of 100mm. Leave to set for 4 weeks, and don’t turn on the heating pipes for at least the first week otherwise it can create bubbles/cracks in the surrounding concrete. Those will limit the ability of the embedded pipe to transfer heat.
Finish the surface with self-levelling compound.
I buy B-grade insulation sheets from the supplier Seconds & Co. They can come from a number of different manufacturers and may be slightly under-size where a fault has been cut off one edge, for example.
I tend to buy enough for several projects all in one go, and then store them outside on a pallet, and beneath a tarpaulin, until I’m ready. This means I benefit from a low-cost delivery by lorry, usually a shared-load with other customers in my area of the country.
Return to Domestic Heating Part-1: Strategies
Return to Domestic Heating Part-2: for an overview of Wet Underfloor Heating systems
(b) Installing wet underfloor heating in suspended floors
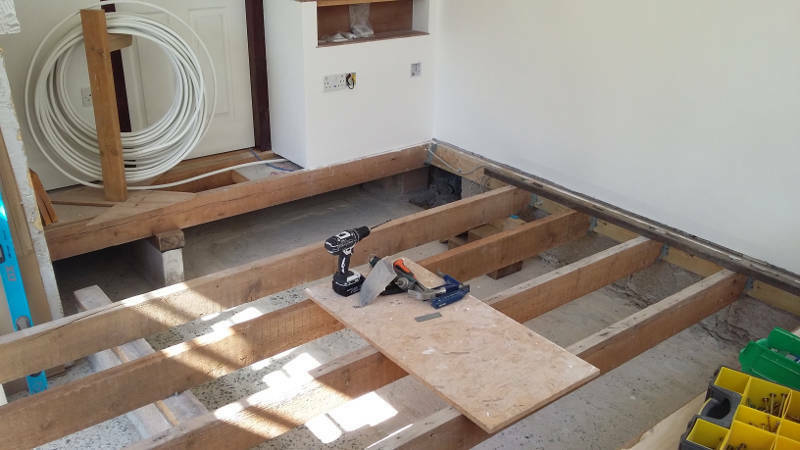
A Suspended floor is where the flooring is held by joists above a void (or above the room below).
Here I’m using reclaimed timber joists which previously supported a flat roof. They aren’t quite deep enough to span the complete distance across the room, so they’re provided with additional midway support from a “stretcher wall”, seen here in the lower left corner of the photo.
To calculate the minimum sizes of timber required for floors and roof construction, you need to consult the approved “Span tables”. These are within an Appendix to Part-A of the Building Regulations. However, you need to pay if you wish to view them in the current version.
Fortuitously, the 1992 version is still archived online. So if you know where to look (here), you can obtain a copy for free!
Cut sheets of insulation and push-fit them between the joists.

I screw supporting plates of wood or thin metal to the underside of the joists to prevent a sheet falling straight through if it’s a bit loose.
Any small gaps between the insulation and the joist can be filled with expanding foam.
Thread cables and wires through the joists.
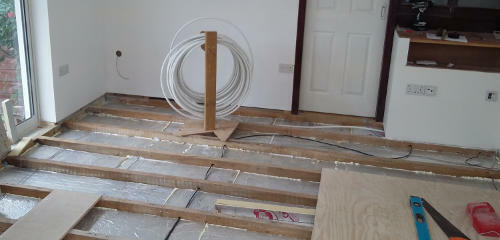
Drill holes for cables within 200mm of where the joist is supported. This is usually at the ends, but in this case I’ve fed a couple of cables through the centre because there’s a stretcher-wall beneath.
Always try to separate mains electricity cables from those used for low-voltage signalling: loudspeakers, computer network, HDMI etc.
Position and fit Heat Spreader Plates. These are a loose fit across the top of the joists. They are made of thin aluminium and can be easily cut with a pair of tin-snips.
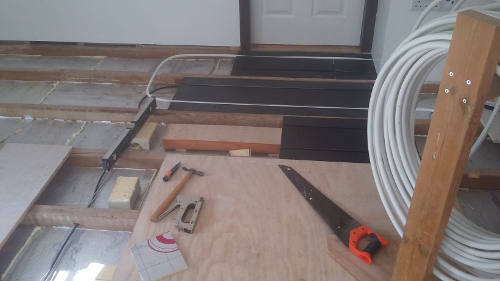
I use a staple-gun to tack the Heat Spreader Plates to the joists. Small wide-head nails could be used as an alternative. The plates differ in length depending on who supplies them. In these photos I’m using plates that are 1.25m long. I generally fit the Heat Spreader Plates and pipe between each pair of joists in turn.
Take care when positioning the notches for pipe runs. You need to take account of the dimensions of the final surface layer. In this case I’m going to be using wooden planks that are 180mm wide, with screws angled through the tongue.
I’ve measured where the planks will be, and ensured that the pipe notches are halfway between where the screws will be in the joists.
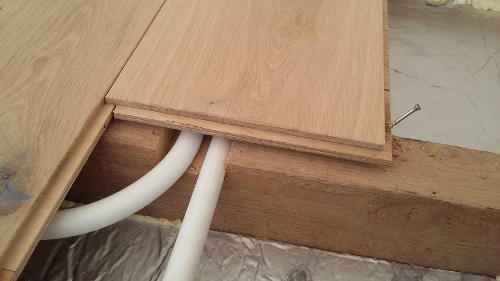
The pipe notches need to be just deep enough to ensure that the top flooring boards won’t actually touch the pipes. If they do, then you can get creaks when the pipe expands and contracts with warm water flowing through it.
I’ve cut 18mm deep notches for 16mm diameter pipe.
Suspended flooring - layout
Positioning the Spreader Plates should be done to maximise the heat distribution, whilst using the minimum pipe run. Long pipe runs will mean that the water runs slower, and thus the room takes longer to reach temperature.
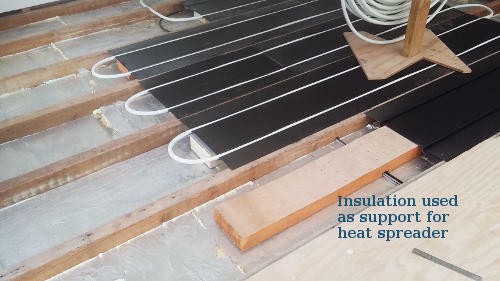
This suspended floor area is 14m². It uses 70m of pipe, including the flow & return to the manifold 7m away. The heat spreader plates provide 7.6m² of radiating surface.

Pipe runs over 100m are to be avoided. Above this length the water flow is too slow and other heat-zones in the house will take their requirement first.
Forward to Part 4; Wet UFH, Filling and Commissioning
Back to Part 2; Wet Underfloor Heating Systems