


The Install Week
On the lead up to our installation date for our Heat Pump (HP), we had everything in place:
- Space outside clear for the heat pump itself
- Internal loft space for the pipework and any system parts
- A clear space inside around the existing boiler for removal
- Storage space for the pipes, insulation and other equipment (being delivered on the first morning)
I got a text message from the lead installer on Sunday evening letting me know that he would be arriving at 8am on the Monday morning. He was actually early and supervised the off loading of the delivered equipment. This can take a little time as there is often quite a lot of items alongside the heat pump itself which need agreeing as scheduled items and delivered.
Other trades were due shortly and so we walked the install route around the property from the HP position, through the loft access, existing pipework, boiler, radiators (6 out of 12 to be replaced), gas supply point and electricity supply.
One of the things I particularly liked was the willingness to listen to options. For example, I had been exploring the possibility of a different route for the main power cable for the heat pump compared to that discussed on survey.
The plumber and electrician arrived shortly after this and set to work – first task, drain down the heating system and identify the radiators for swapping out. The gas engineer was due to arrive on the second day but as the team were ready to remove the old boiler, they got in touch with a nearby colleague and the boiler was taken out and the gas capped.
So by the end of day 1, things were moving and there was no boiler and no hot water (the team had brought electric heaters to help heat overnight.
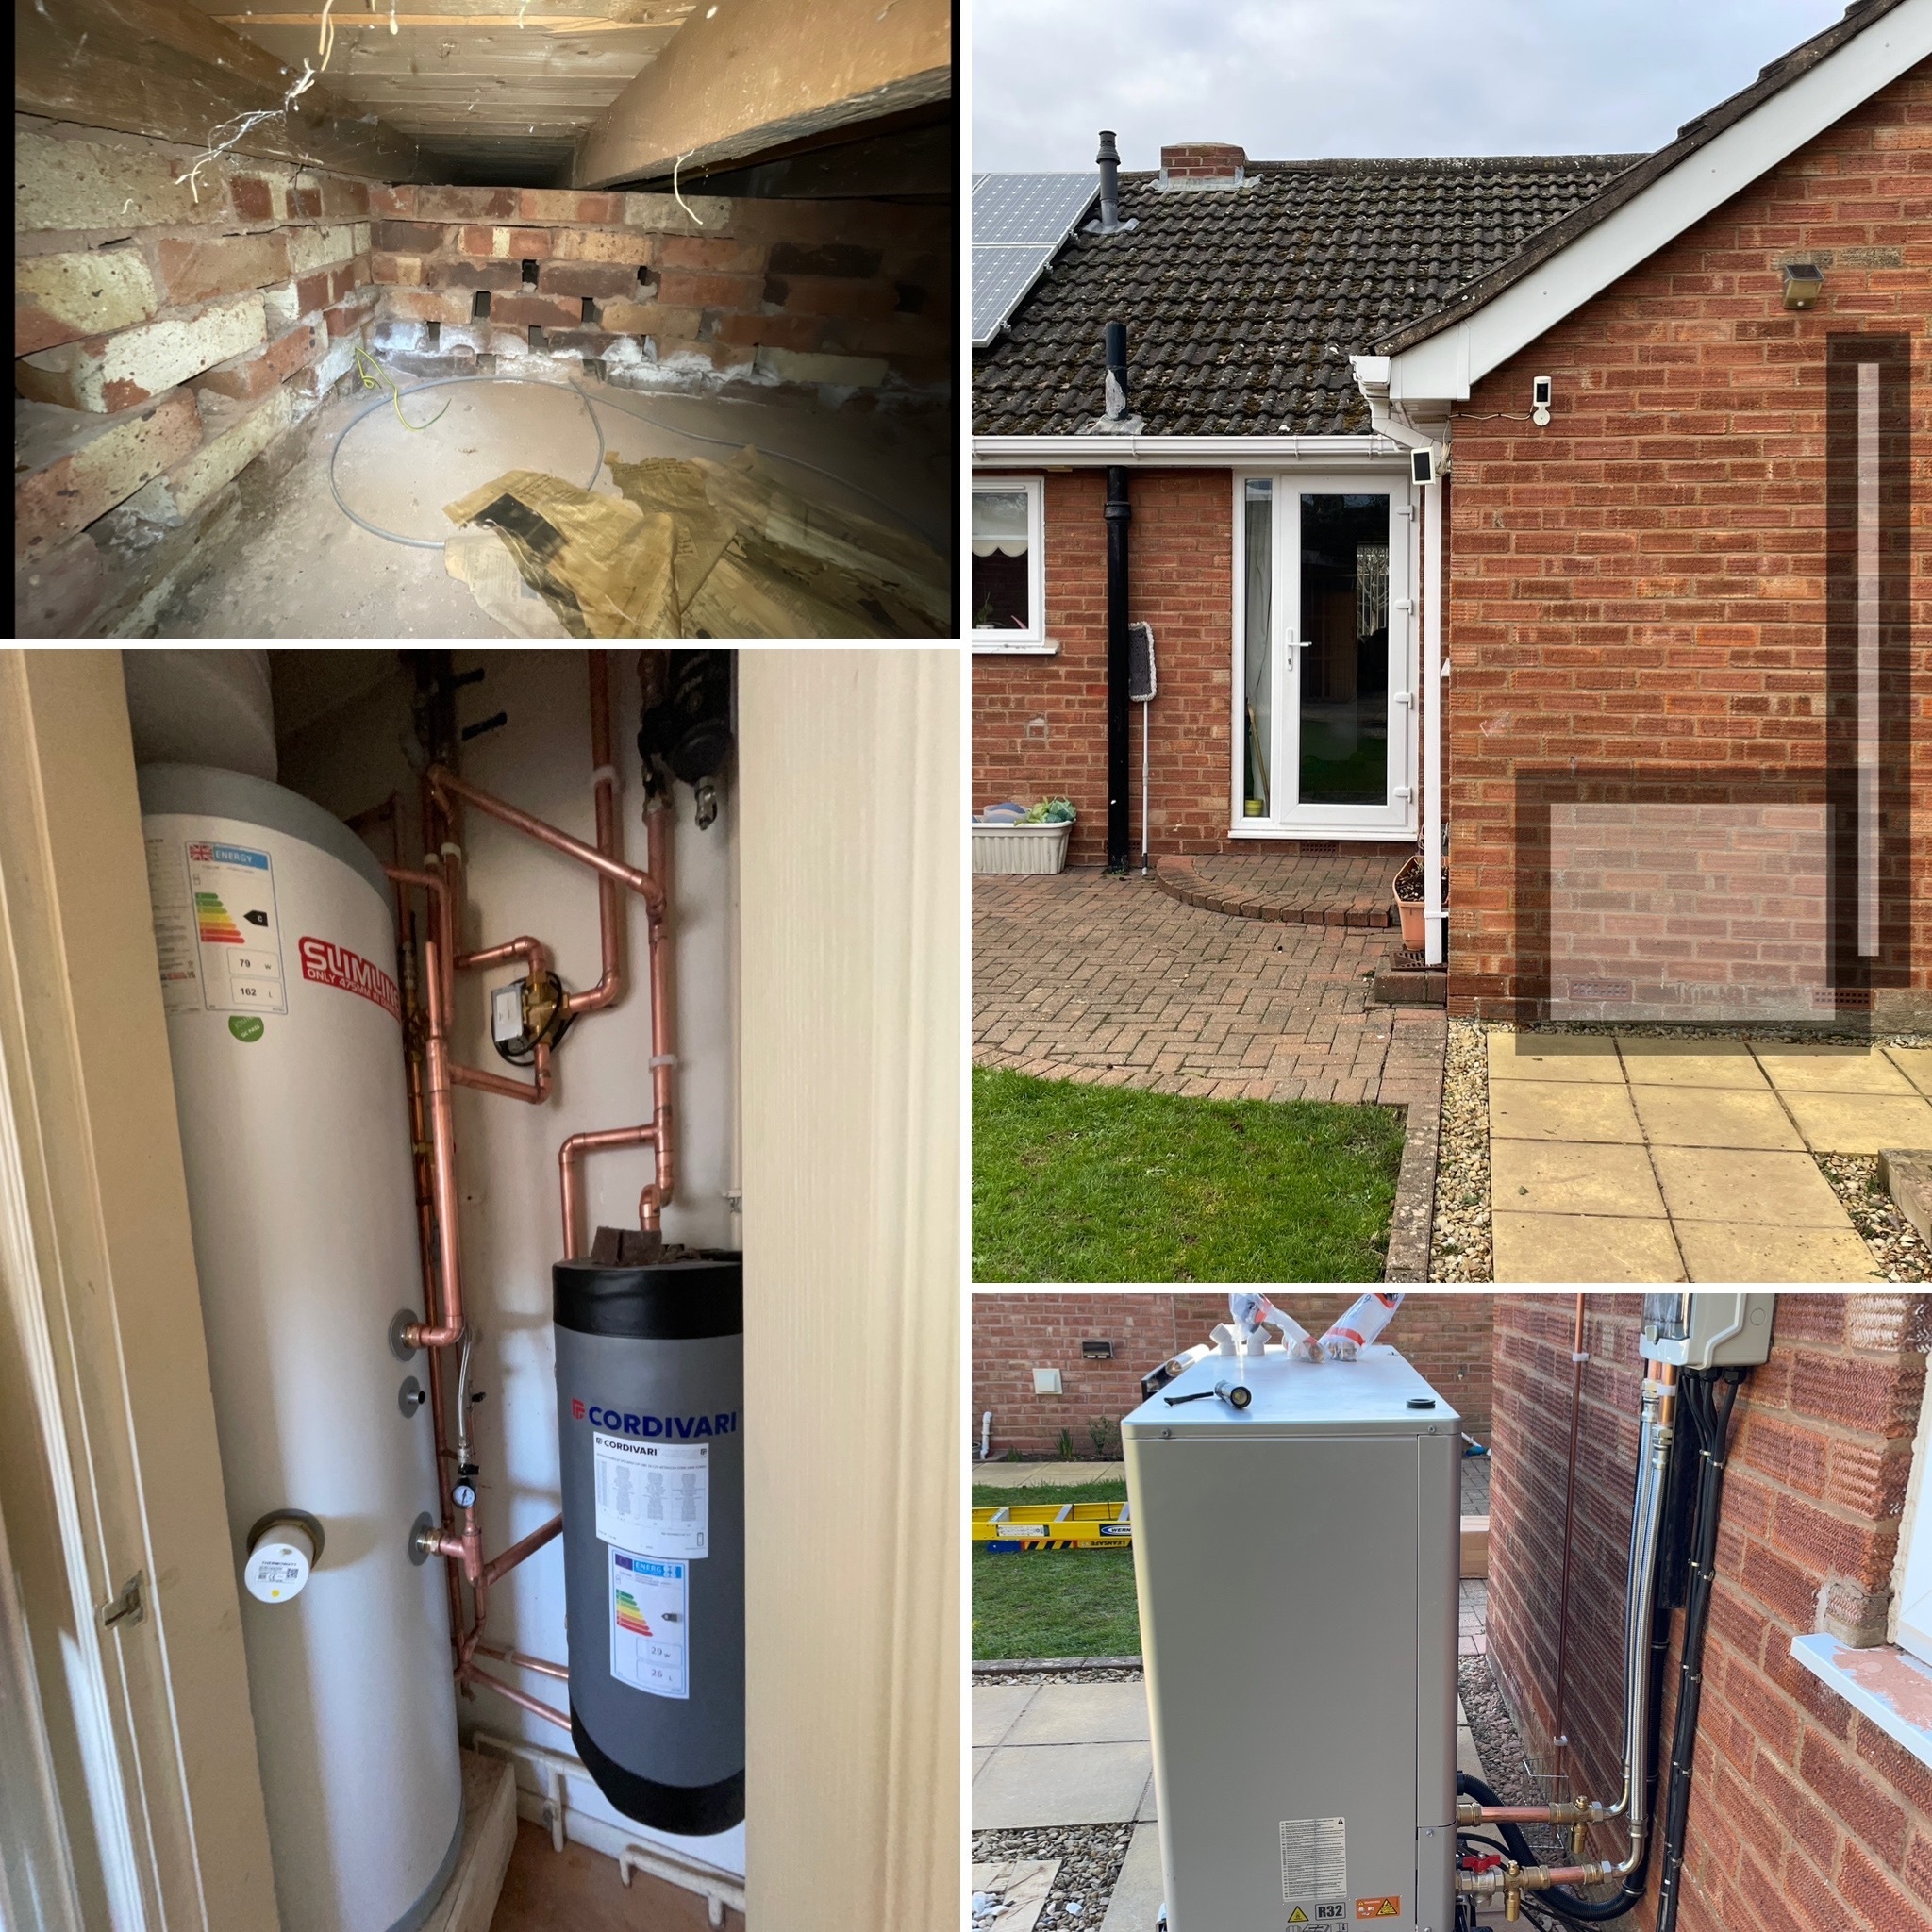
Top left - void under house (cable run option)
Top right - suggested position for HP
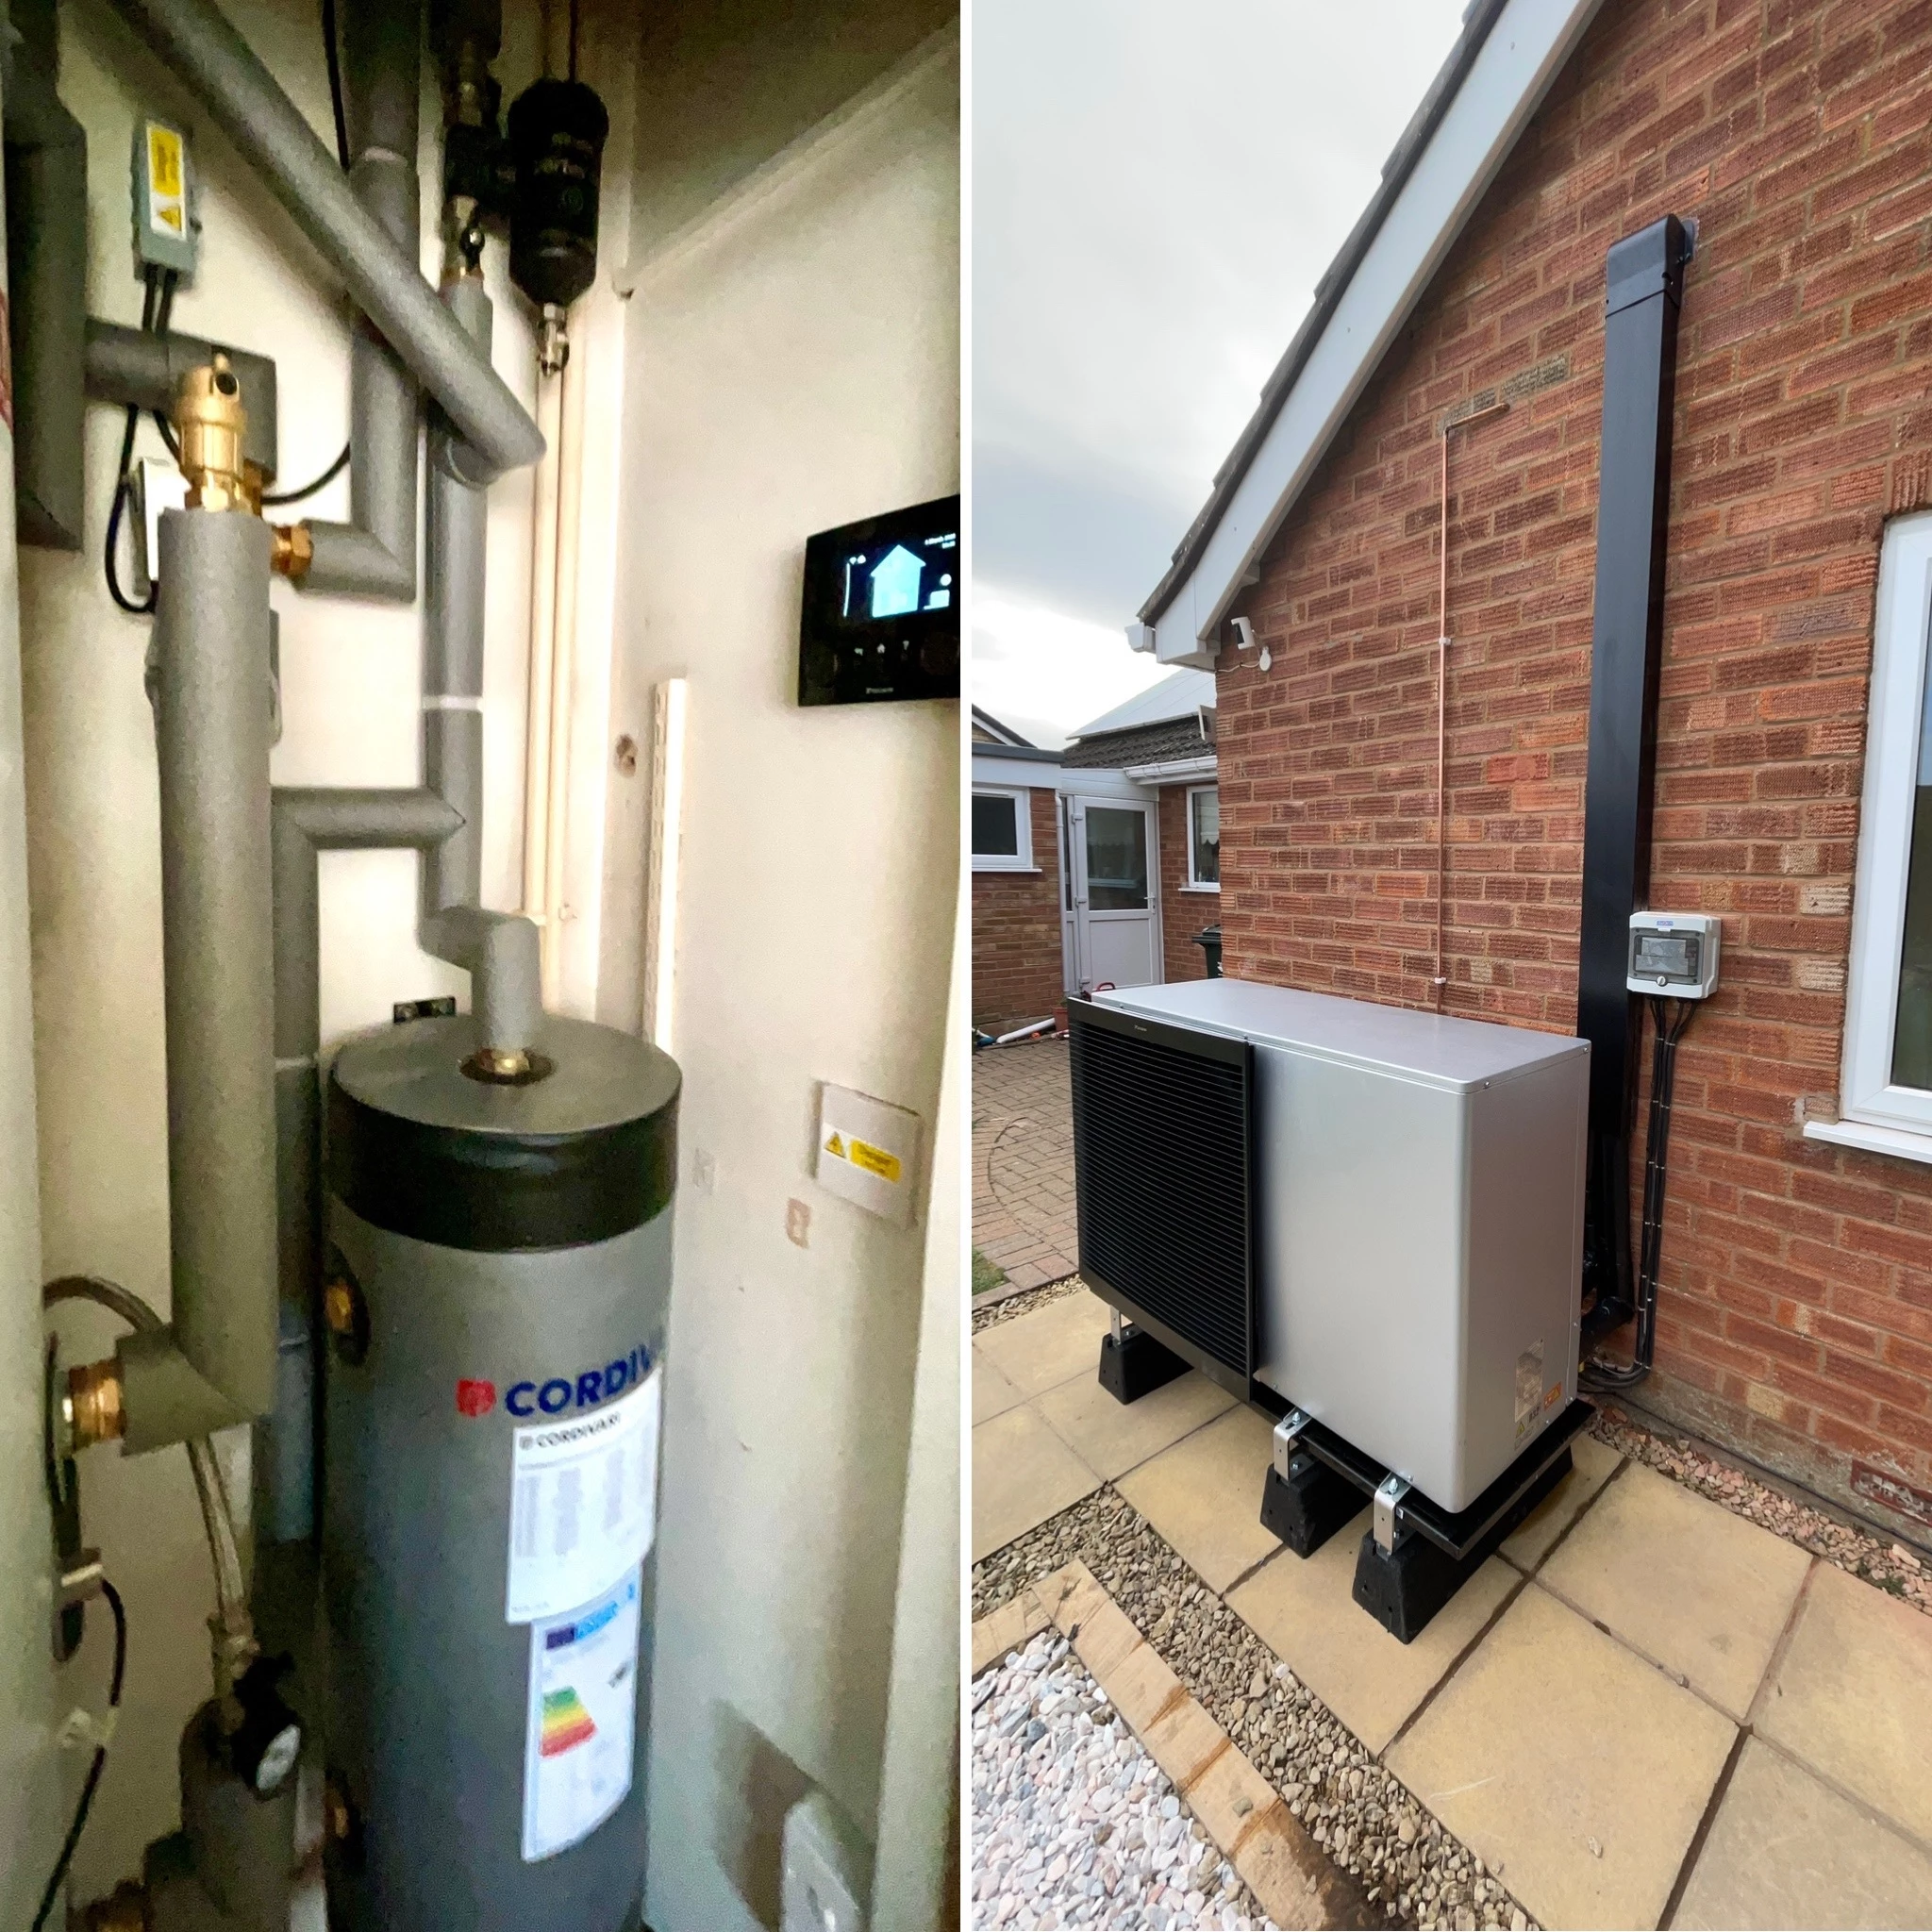
Bottom left - hot water tank position
Bottom right - first cable and pipework to HP
Day 2 and Day 3 were similar in operation and by this time much of the pipework was in place (but not lagged) and the radiators were almost done. While much of the install was step by step, the team worked well together so that any needed work was done (plumb, cable, power, test) for each section to be completed before moving on to the next.
Originally the cabling was due to follow existing primaries into the loft and then out to a small distribution board for connection but as I mentioned earlier, the property is built with a void underneath (local geology) and as this looked to be a straight route from incoming power to HP location, I suggested they try to feed the cables through the void. This was eventually successful but it did take a few floorboard removals to stop snags on the way.
The heat pump itself was needed to be carried into position – quite a weight. We have gravel across the front of the property and the team did not have any mechanical lifting device anyway so they carried it between them around from the delivery location to the installation position at the rear.
By the end of Day 3, much was done but the final wiring to the HP was not completed and so we remained without heat and hot water for another day. The hot water tank does have an immersion heater built in and I had expected that to be available mid week but I understand that the control for this is via the HP and so as the wiring was not in place, neither was power for the immersion option.
Day 4 was taken up checking all joints, powering and running the system and then lagging. Each part of the system is checked individually and then full control.
This type of set up defaults to Hot Water and once that is up to temperature a diverter valve switches the hot water to the heating loop and radiators. A look through the operating system with its schedules for heating and hot water led me to get a few things initially in place and everyone was expecting to be finished – the lead installer was due early on Day 5 to ensure everything was ok.
I woke up in the early hours of Day 5 as the HP sounded to be working full out. The house temperature had also risen to 23 degrees C despite the overnight setting being 18. At that time of the morning I was not fully ‘with it’ and so eventually after a couple of system resets, I turned off the Hot Water as that appeared to be the only thing which allowed the HP to get back to a normal operation.
Once morning arrived fully, our lead installer drove up and I greeted him with the news of the overnight problem. Calling the electrician to check all the connections, terminals etc., it was finally concluded that the diverter valve was faulty and would need replacing. They located one about 45 mins drive away and set to collect and return. It was this valve which was open to the heating loop although the system was calling for hot water, hence the issues with the higher overnight temperature.
Well on return, the new Honeywell valve was fitted and the system tested. It all worked.
So all in all, an interesting installation week. Obviously there is a need to be aware of the potential length of the install plus the lack of heating and hot water for at least some of the time. Something to be aware of.
Now to explore the control options and get it set up how I want
(See my pre-install experience here)